新建Qt项目
按照如下格式,新建一个项目的pro文件(可以是Qt Creator创建,也可以是qmake来创建):
QT       += core gui xml
greaterThan(QT_MAJOR_VERSION, 4): QT += widgets

TARGET = 1_FirstApp
TEMPLATE = app

SOURCES += main.cpp\
        mainwindow.cpp

HEADERS  += mainwindow.h

LIBS += -lqgis_core -lqgis_gui

unix{
DEFINES += CORE_EXPORT=
DEFINES += GUI_EXPORT=
}
!unix{
DEFINES += CORE_EXPORT=__declspec(dllimport)
DEFINES += GUI_EXPORT=__declspec(dllimport)
}
需要注意的是:
- 使用
QGIS时,必须要包含Qt的XML模块 LIBS += -lqgis_core -lqgis_gui表明,该程序要包含两个lib文件:qgis_core.lib、qgis_gui.lib(以Win中OSGeo4W为例,这俩文件在C:\OSGeo4W64\apps\qgis\lib)- 使用
QGIS需要定义两个宏(如果用别的模块还有有其他的宏需要定义),Unix系统下定义CORE_EXPORT、GUI_EXPORT为空即可,Win下需要定义为__declspec(dllimport)。
在使用QGIS库时,项目还需要能够找到QGIS项目的头文件及lib文件所在路径。因此我们需要告诉项目include和lib所在的路径。许多人直接在pro文件里面显示指定路径,然而我并不推荐这样使用,因为这会破坏项目的跨平台性。(在Linux系统下,默认是不需要显式指定的)
我的做法是,设置两个环境变量,分别为lib与include,将所用第三方库头文件、库文件所在路径都加到变量里面去。另外,程序运行的时候还需要在Path变量里面找到dll所在路径。下面是我添加的环境变量(Windows OSGeo4W为例):
lib      C:\OSGeo4W64\apps\qgis\lib;C:\OSGeo4W64\lib
include  C:\OSGeo4W64\apps\qgis\include;C:\OSGeo4W64\include
path     C:\OSGeo4W64\bin;C:\OSGeo4W64\apps\qgis\bin
添加代码
在main.cpp里面,把QApplication替换为QgsApplication,并且其构造函数要增加第三个参数。main.cpp代码如下:
1 |
|
其中,QgsApplication::setPluginPath(QDir::currentPath()+"/Plugins");表示指定QGIS插件路径为程序所在目录下Plugins文件夹。因此在运行程序之前,需要将QGIS所有插件(Win下是dll文件)复制到这个文件夹下面来,否则程序无法读取空间数据。(OSGeo4W中,QGIS插件路径为C:\OSGeo4W64\apps\qgis\plugins)
现在,就可以直接运行程序,弹出一个空白的对话框:
打开Shapefile文件
现在我们来对MainWindow类进行操作,使其具有打开矢量文件并显示的功能。代码如下:
mainwindow.h
1 |
|
mainwindow.cpp
1 |
|
QGIS程序中,显示、渲染空间数据的Widget类是QgsMapCanvas类,该类的setLayerSet()函数用来控制canvas中待显示的图层。QgsVectorLayer的一个对象,就代表一个矢量图层。
需要注意的是,往画布里面添加新的图层时,要在QgsMapLayerRegistry::instance()对象中进行注册。
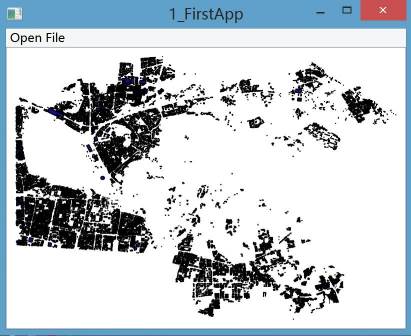
程序运行,并打开一个Shapefile文件的效果图如下(一定要记得将QGIS的Plugins目录复制到程序所在路径):

PS:使用OSGeo4W时,由于只提供了Release版的QGIS,因此也只能编译Release版的程序。如果程序需要调试,可以考虑采用log的方式。
代码
本教程所有例子的代码,托管在Github上,地址:https://github.com/chenguanzhou/QGIS-Cpp-API-Tutorial